DSM Instructional – Entering Payments, Adjustments & Credits
These
instructions cover basic payment entry, adjustments and credits in DSM.
On the menu, go to Billing > Enter
payments.
You will see the following screen:
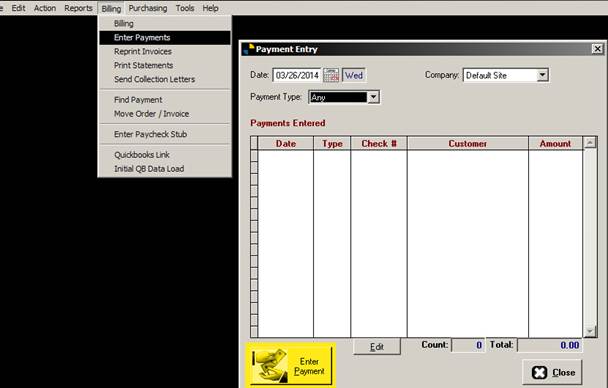
By default, this screen will show any
payments entered for the date shown at the top.
If you just want to enter a payment for a client, click “ENTER PAYMENT”
below.
Find your customer and click search:
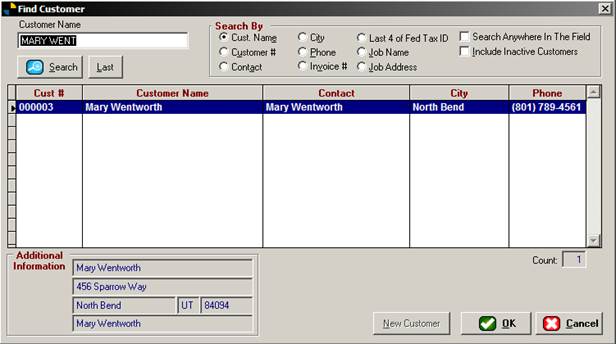
Once you’ve found your customer,
either double click them or highlight and click
OK. You will see the following screen:
NOTE: You can also get to the payment entry
screen from any customer screen using the FINANCIAL DETAILS button:

There are many payment types/methods
in DSM, so we’ll look at each below.
Entering the payment using a check:

Note: You have
an option to “Manually Distribute” the funds.
Using this utility, you can distribute funds from one check to multiple
invoices if you wish.
Entering a payment using CASH:
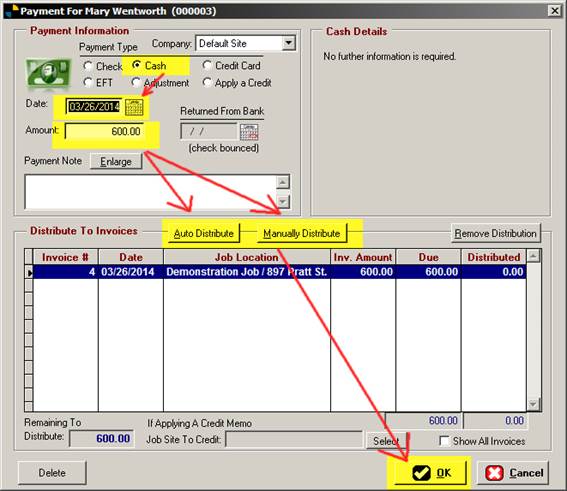
Entering the payment as cash is
similar to a check with the same options minus the Check Number.
Entering the payment using a Credit Card:
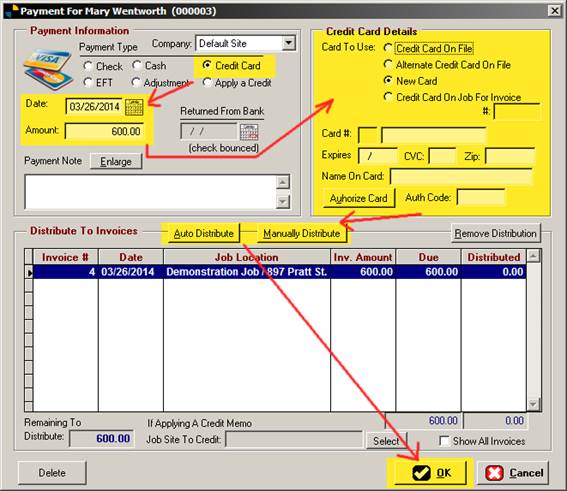
Entering the payment using a credit
card is typically done via an external system but with DSM you can run the card
directly through the system and charge the card. Note: You must configure your authorize.net
account information in DSM prior to using this feature.
Entering a payment using the EFT option
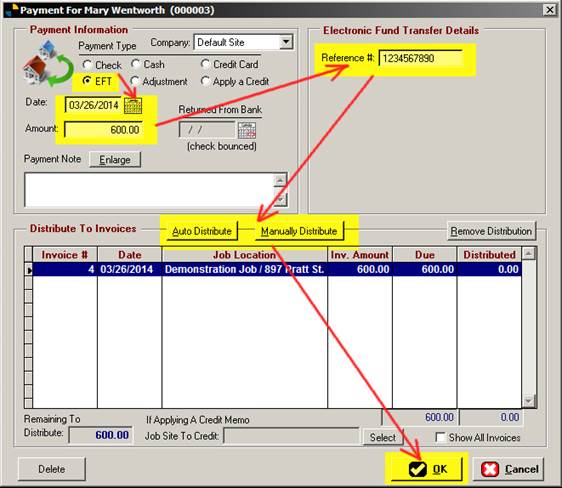
Using the EFT option is like the
others. Simply select EFT, a reference
number if you like and distribute the funds.
Using Adjustment as a payment:
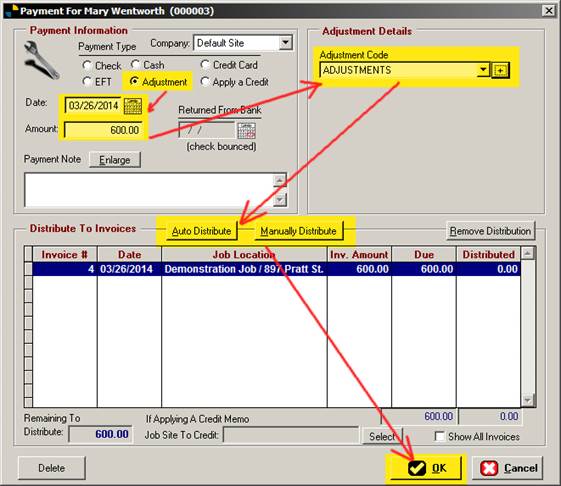
If using the
adjustment option, this allows you to adjust off the amount of the invoice
should you need to.
Applying a Credit
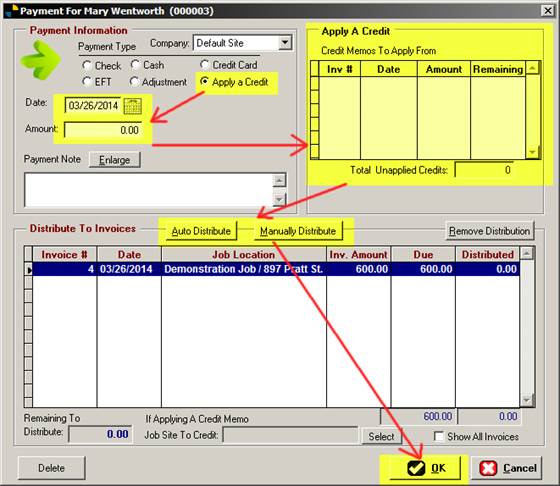
For now, we’ll assume that you made a
500 dollar payment using a check.
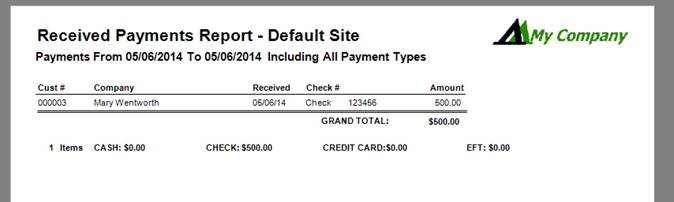
Now we’ll run a report. Go to Reports > Accounting Reports >
Received Payments > Received Payments Report. You will see the following screen:
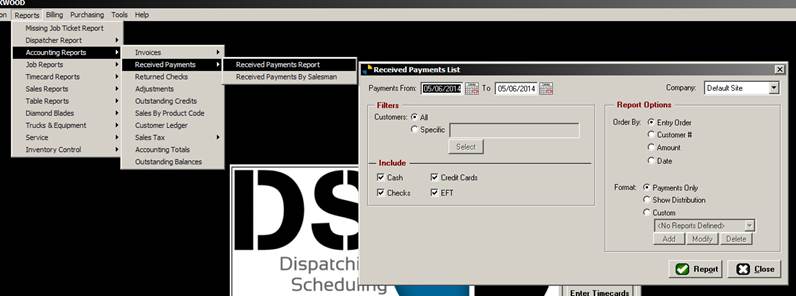
Since we entered the payment today,
simply click REPORT at the bottom and you will see the following:
Some helpful tips on Finding payments:
Should you need to find a payment and
have few details on it, you can always go to BILLING > FIND PAYMENT.
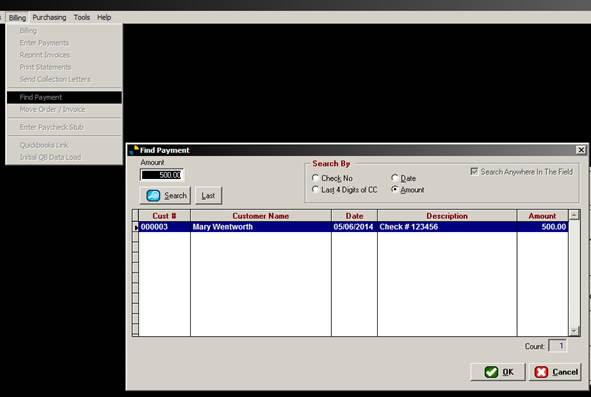
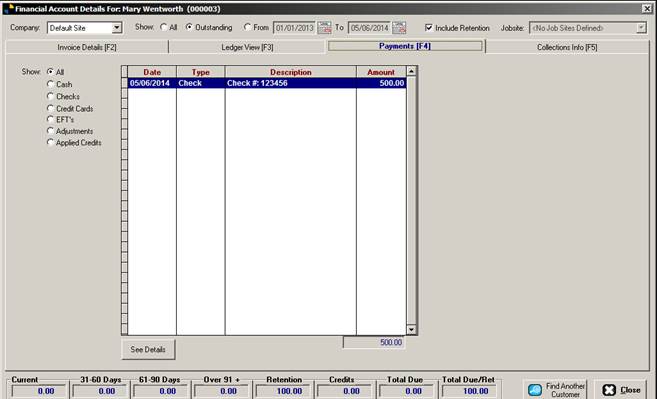
Clicking OK will take you directly to the
PAYMENTS tab on the customer financial history screen:
End of document.