Installing DSM Mobile on your
devices.
These instructions cover installing DSM Mobile on your
devices.
NOTE: DSM MOBILE ONLY FUNCTIONS IN CLOUD
CONFIGURATIONS, AND IS NOT A FEATURE OF SELF HOSTED DSM CLIENTS.
Next, you will need to authorize a user to connect to your
system. To do this, go
to FILE > ADMINISTRATION > USER
ADMINISTRATION.
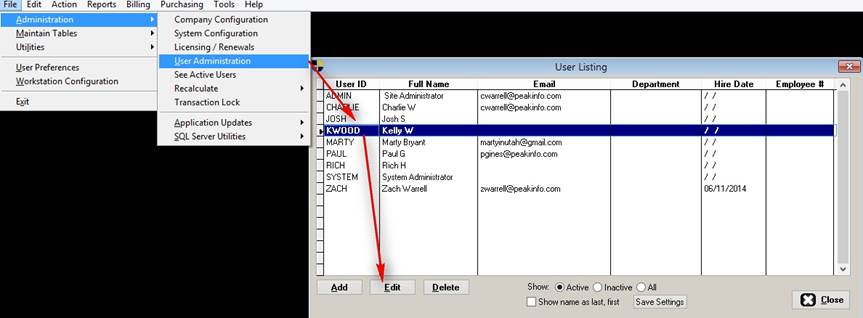
Find the user, then double click them or highlight and click
Edit.
Under the COMMUNICATIONS Tab, we’ll set a few options.
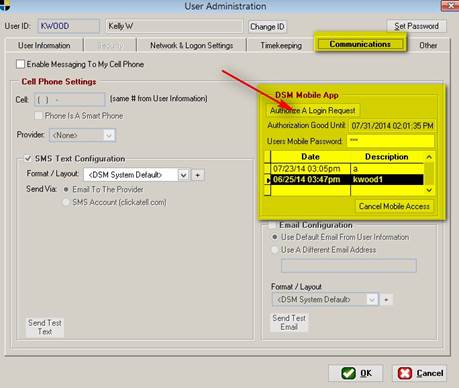
Click the BUTTON that says “Authorize A
Login Request,” then click OK.
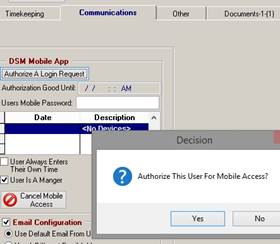
Click Yes.
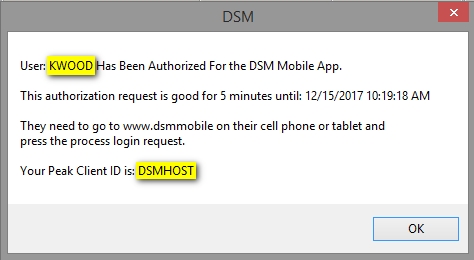
You will then see a screen with the information needed to
continue the setup.
You will now have a period of time to get your mobile device
for this person set up.
CONFIGURING A MOBILE DEVICE:
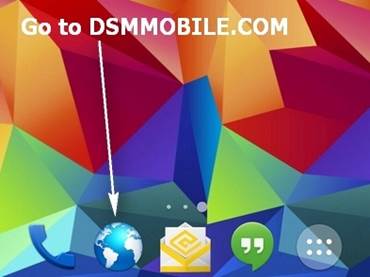
Now, on your mobile device (or any device with internet
access), go to dsmmobile.com
and install the DSM Mobile Application.
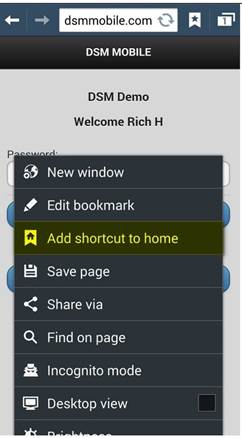
FOR ANDROID:
Once it comes up, then add the
shortcut.
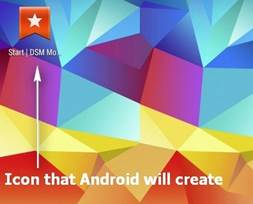
Once the shortcut is created, it may appear as shown.
FOR IPHONE:
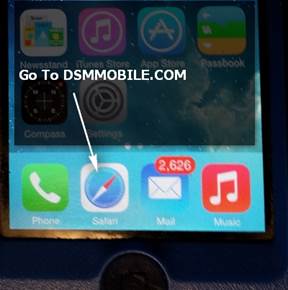
Once there, tap the following:
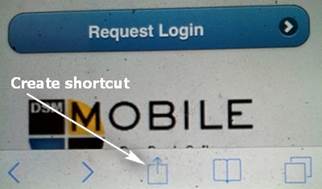
Then, create your shortcut as shown here:
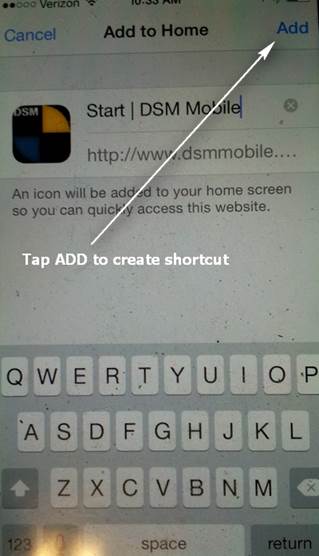
Once you’ve set it up
on your phone, continue on below.
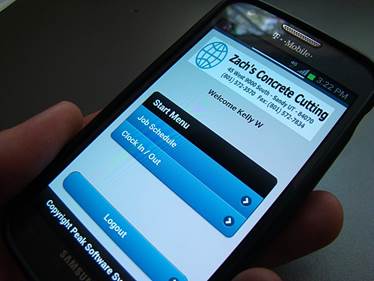
You will see the following screen.
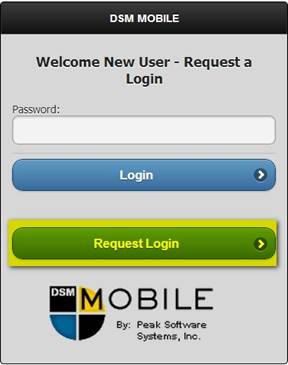
From here, you will then tap the “request login” button.
You will see the following screen:
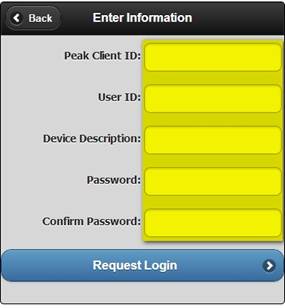
PEAK CLIENT ID: Enter
your ID from the earlier steps.
USER ID: This is YOUR
USER ID within DSM.
DEVICE DESCRIPTION:
Type anything you like. (E.g. Toms Phone)
PASSWORD: This is
your DEVICE password. IT IS NOT YOUR DSM PASSWORD.
Tapping “REQUEST LOGIN” will then attempt to register the
device on your DSM System. If a good
connection is made, you will see the following screen, complete with company
logo and your schedule.
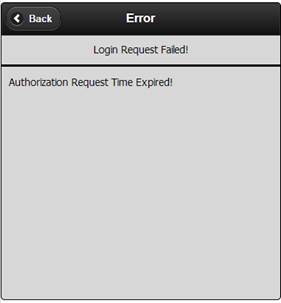
If you see the screen below, then you need to edit the user
in DSM again as shown in the 1st steps and allow them the
connection.